Creating tests

This tutorial explains how to create tests, pools, and surveys. They can be created in a content area or using the control panel.

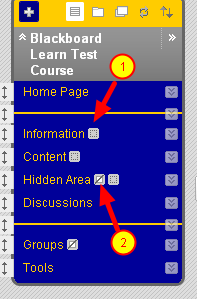
Make sure editing is ON

wpid29-media_1289954500317.png

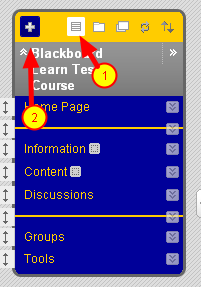
To add a test directly to a content area (area linked to from the left side course menu), make sure editing is on and go to the content area.

Tests are an “Interactive Tool”

wpid30-media_1289954615458.png

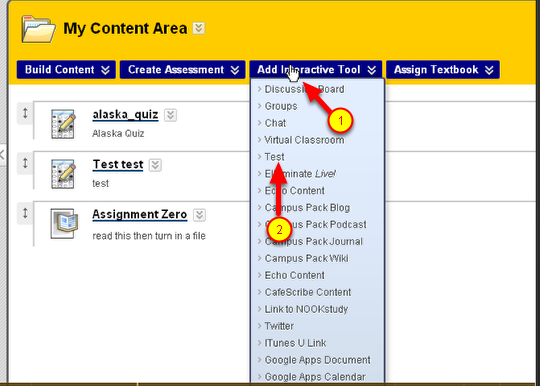
(1) Hover over the link labeled Add Interactive Tool
(2) Click on the link labeled “Test”

Create or add a test

wpid31-media_1289954751037.png

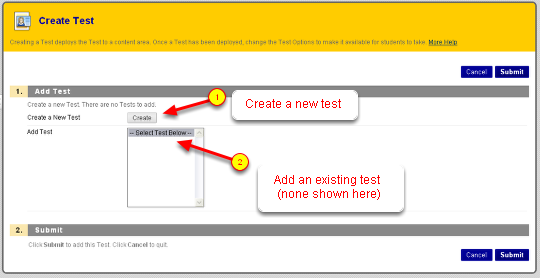
From here you can create a new test (1) or add an existing test. Before going into details, we will show the alternative way to create tests.

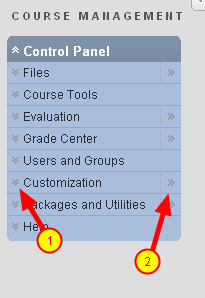
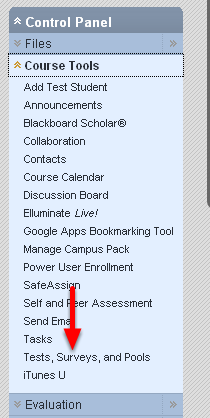
Accessing Tests, Pools, and Surveys from the Control Panel

wpid32-media_1289955089673.png

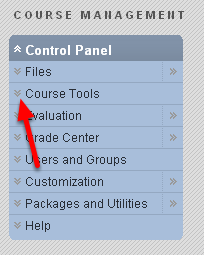
In Control Panel find Course Tools and click on the down-arrow to the left.

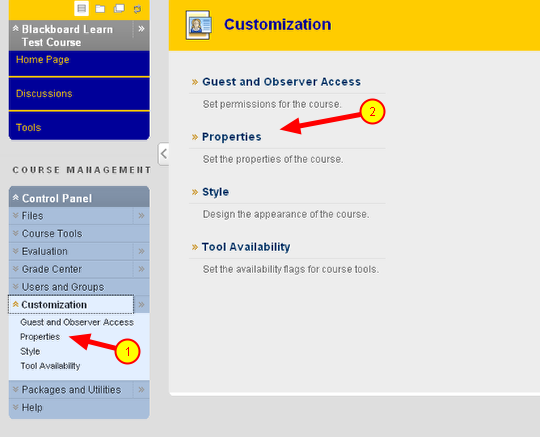
Click on Tests, Surveys and Pools

wpid33-media_1289955193908.png

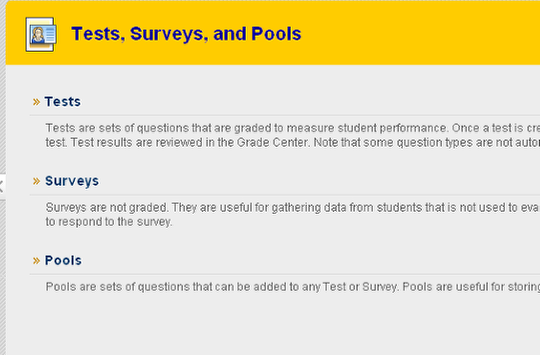
Click on the link to Tests (or Surveys or Pools) that appears in the main window

wpid34-media_1289955286906.png

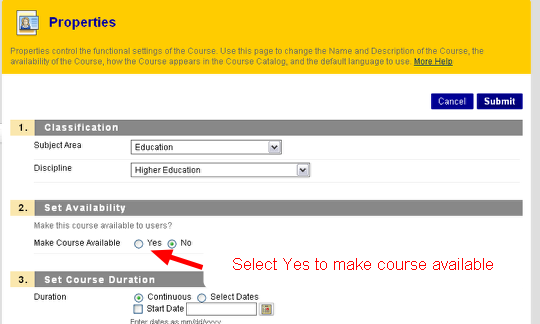
Build a new test or import a test

wpid35-media_1289955322228.png

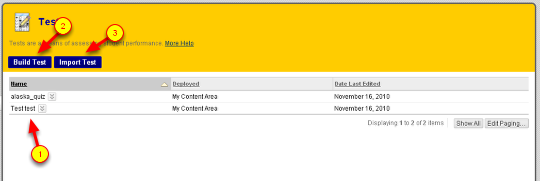
You’ll see the list of existing tests (1) and also links to Build a new Test (2) or to Import a Test. (3) Tests are imported from a zipped file which is exported from Blackboard or from a publishers program.

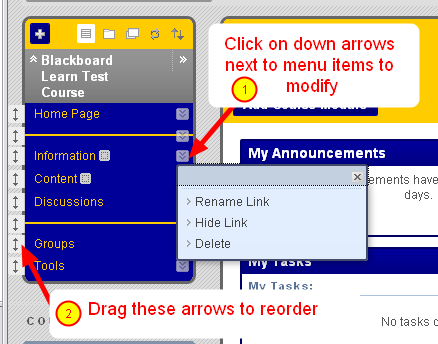
Modify an existing test

wpid36-media_1289955476442.png

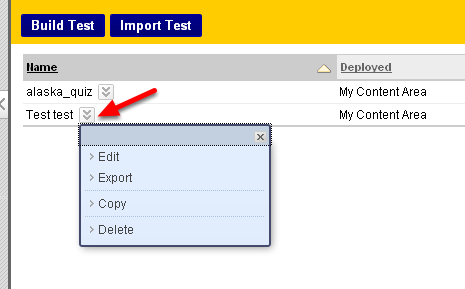
To modify a test, click on the down-arrow next to the test name, You can edit, export, copy or delete the test. (Your ability to edit or delete will be limited if the test is deployed and students have taken the test.)

Building or editing a test.

When you Build or Edit a test, the steps are very similar to previous version of Blackboard. For more instructions on building a test and the types of questions possible, see this pdf file (22 MBytes)
http://library.blackboard.com/d/?c637668a-85d0-4d99-bb38-2f6c60691c76

Manage Course Menu

The course menu is the set of buttons or links on the left side of the Blackboard course site. You can customize this. In Blackboard 8 the course menu was modified using the control panel. This tutorial shows how to edit the course menu in Blackboard 9. You can also follow this link http://ondemand.blackboard.com/r9/movies/Bb9_Course_Environment_Edit_Course_Menu.htm for a video tutorial on modifying the course menu,

In Blackboard 9 (Blackboard Learn) you must first make sure that editing is turned on

media_12899365562971.png

In the upper right click on the ON/OFF button and make sure it is on

If you are in “list view” you will see a big PLUS + on the upper left of the course menu

media_12899365948431.png

The menu must be shown in “list view” – go to list view by clicking on the button that looks like a square with horizontal lines through it. When you are in this view a large PLUS sign ( + ) will appear.

Click on the + to add new items to the course menu

Add new items to the course menu

media_12899367680311.png

From the menu you get by clicking on the big +, you can add a new content area (an area in which you can add items, tests, assignments etc), a blank page ( this is the same as an “item” – a page to which you can add formatted text and attachments), a tool link (link to a tool such as discussion or My Grades), a course link (link to somewhere in the course), an external link (link to a website or URL) a modular page (this is a fancy page like the new “Home Page” that lets you add a bunch of blocks such as announcements, calendar etc), a subheader or divider (text or dividers to make your menu more readable.)

Modify existing links or items in the course menu

media_12899372261161.png

(1) Click on the downward arrows next to a menu item to rename, hide and unhide (from students) or delete.

(2) Drag the menu items up or down to re-order. Click on the up-down arrow to grab them

Icons next to menu items

media_12899375757311.png

When you are in edit mode, the little icons next to the menu items tell you when a content area is empty (1) or when it is hidden from the students (2). If you forget what the icons mean you can hover over them.

End of Tutorial

This tutorial has shown you how to modify the course menu by adding new items and by deleting, renaming or re-ordering existing items. Follow this link

http://ondemand.blackboard.com/r9/movies/Bb9_Course_Environment_Edit_Course_Menu.htm

for a video tutorial on modifying the course menu and other customizations.

Make Course Available

As with Blackboard 8, you’ll need to make your course available before students can see it.


In the Control Panel at lower left, click on Customization

media_12899402288841.png

Click on the downward arrow to the left of Customization (1)

OR Click on the rightward arrow to the right of the word Customization (2)

Click on Properties

media_12899403252121.png

Click on the word Properties. This will be on the Control Panel (1) if you’ve clicked the down arrow and/or on the center of the screen (2) if you clicked to rightward arrow.

In item 2. select Yes to make your course available

media_12899404554651.png

Change the No to Yes under heading 2. Set Availability to make your course available to students.

End of tutorial

Your course is now available to students when they log onto Blackboard.