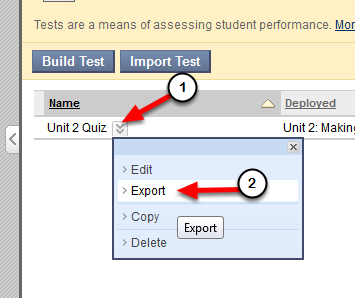
Course materials, tests, and activities can be copied from one semester to another. The biggest thing to be aware of when copying course material is that some components of your course may be linked to other components. For example – a test deployed in a content area is linked to the grade center and to “Tests, Surveys and Pools”. All three things need to be copied.
- The safest way to proceed is to copy the entire course, then delete what you do not want.
- After you copy a course it is important to wait a while – even after the course copy email is received, wait a good half hour or more before trying to edit the course – otherwise you are apt to be frustrated by items that refuse to be re-ordered or edited!
Go to the OLD course

- Go to the course you want to copy material from.
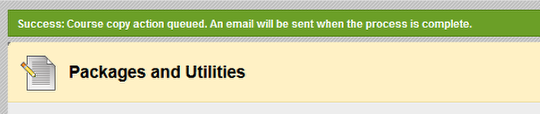
- In the Control Panel go to Packages and Utilities, then Course Copy
Browse and find the NEW Course
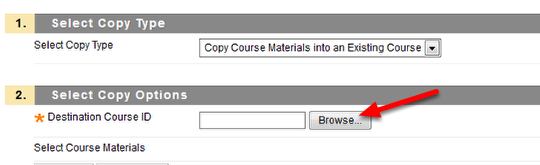
- Leave the selection for (1.) as Copy Material into an Existing Course
- Click the Browse button – you’ll have a list of all courses you have access to. Find the NEW course into which you want to copy.
- The list of courses is ordered by semester. There may be more than one page of courses.
- Select the circle next to the course and Click Submit
Select All
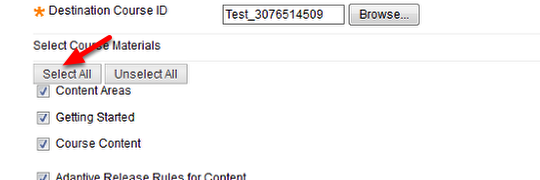
The safest way to copy is to copy everything and then delete what you don’t want from the NEW course. (It is safe to uncheck Announcements if you don’t re-use those from semester to semester.)
- Click Select All
- Don’t worry about boxes that are unchecked when you click Select All.
Uncheck "Limit package to only files linked to from the selected content areas".
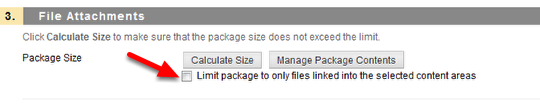
Unless you are sure that you only want to copy resources and files that are linked to from the course, uncheck the box in part (3.) labeled “Limit package to only files linked to from the selected content areas”. It is particularly important to do this if you’ve uploaded “zipped” packages of content (such as Softchalk lessons for example).
Success message appears
A Success message appears. You’ll get an email announcing when the copy has completed – however DO NOT EDIT THE COURSE for a while even AFTER you get the email. Trying to edit the course too soon will cause headaches when course material won’t properly edit or allow itself to be re-ordered.
If you get a Success message but don’t think your course has copied
- Make sure you SCROLL down – the copied content may be at the BOTTOM of your course menu.
- If you have a success message and a log file that has no fatal errors – don’t try to copy again! You’ll likely end up with duplicates of everything in the course!
What happens when you course copy
- If the NEW course has a content area with the same name as the OLD course – content and activities will be copied there. For example, if your NEW course has a “Getting Started” content area, then content from the OLD course’s Getting Started area will be copied there.
- If the OLD course has a content area that has a different name (doesn’t appear in the NEW course) – then it will be copied to the BOTTOM of the NEW course menu – you’ll need to re-order things. For example: your OLD course has two content area named “More Links” and “Final Project” – in the NEW course they will be copied to the bottom of the course menu and need to be moved to the appropriate locations.
- Discussion forums will be copied along with all the posts (which will be labeled anonymous). You’ll need to delete unwanted posts
Re-ordering items on the course menu.
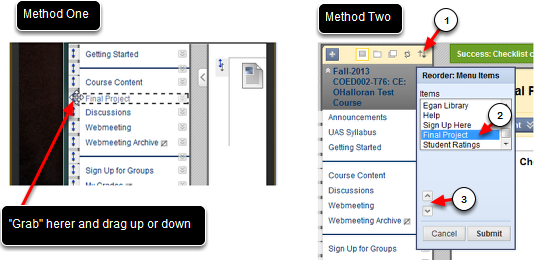
There are two ways to re-order menu items
Method One:
- “Grab” the up-down arrow next to the menu item (click on the up-down arrow, do not release) and “drag” the menu item to the appropriate location.
Method Two:
- Click on the two arrows at the top-right of the course menu (1)
- Select the menu item you want to re-order by clicking on it (2)
- Click on the up or down arrows (3) to re-order
- Submit when you are done
Deleting items from the course menu
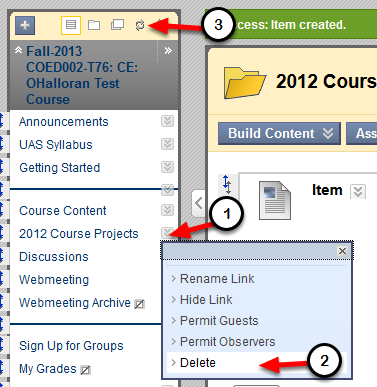
To delete something from the course menu, click on the drop-down menu to the right of the menu item (1) and choose Delete (2).
You will need to refresh the course menu in order to see the changes (two arrows going in a circle at the top of the menu (2))
Hiding content areas
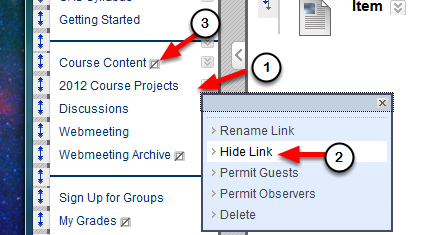
While you are editing the course you may want to hide content from students. To do this use the drop-down menu next to the content area(s) ((1) in the figure above) and choose “Hide Link” (2)). When Content Areas are hidden from students you’ll see a square with a slash through it next to the menu item (3).
Deleting unwanted Discussion Forum posts

Blackboard copies Discussion Forum posts from one course to another but changes the authorship to anonymous and doesn’t copy replies.
- You’ll need to enter each discussion forum and delete all posts
- Inside the forum, click the top box to select all posts (1)
- Click Delete (2)
Changing due dates
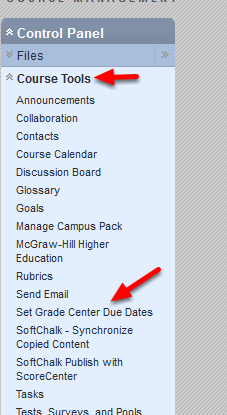
Blackboard has an handy-dandy tool to change all the due dates in your course at once!
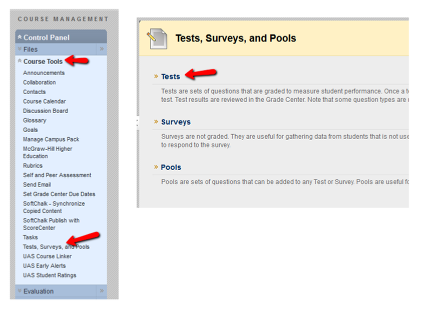
- Go to Control Panel – Course Tools and choose Set Grade Center Due Dates
- One that page you’ll see everything in your Grade Center which has a due date and have the opportunity to change due dates and set availability.
- For the date(s) chosen the time will be set to 11:509 pm.
- Due dates are visible to students in their gradebook (My Grades) but do not limit availability.
Other things to consider
As you prepare your course for the next semester, remember
- Consider making parts of your previous course unavailable (if there is material that you don’t want current students to have access to).
- Change the colors of your OLD course (Control Panel > Customization > Teaching Style) so that you don’t confuse it with your new course.
- Check your deployed exams, graded discussions, assignments, etc. to change their availability and set the appropriate level of feedback.
- If your course is organized as folders you can control availability on a folder-by-folder basis.