Note: January 2013: Course Copy is temporarily (we hope) not working – use the Export/Import – Export from your old class, then Import to your new class.
To move a class from one server to another you need to Export the course from the old server then import to the new server. This lesson describes how to Export from Blacboard and Import to another Blackboard. This involves saving a zipped file to your computer from the old server then importing that same zipped file to the new server.
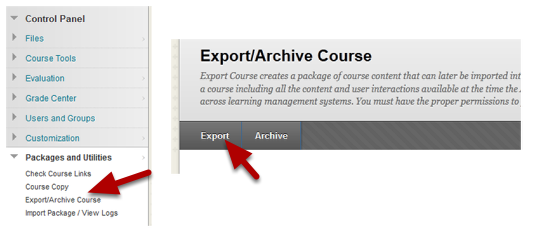
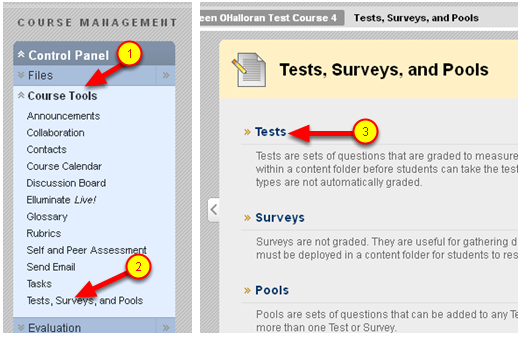
Go to your old Blackboard Course
- Go to your old Blackboard course
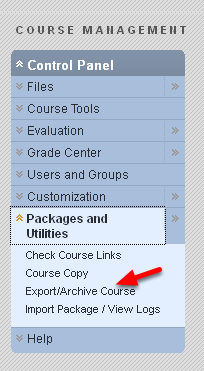
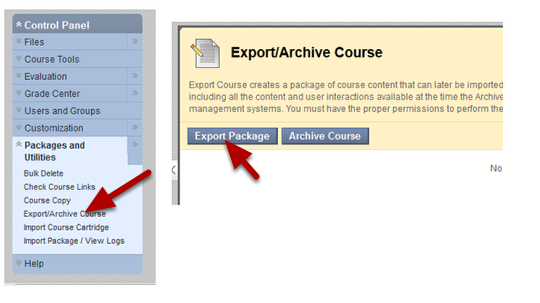
- Go to the Control Panel and Click on Packages and Utilities
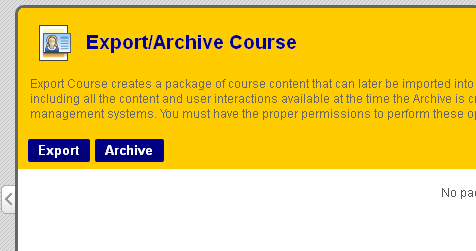
- Choose Export/Archive Course
- When that panel opens, click on the Export link
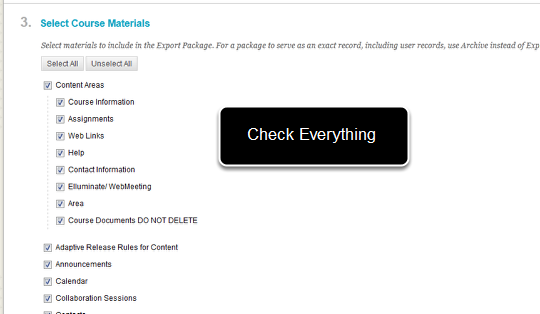
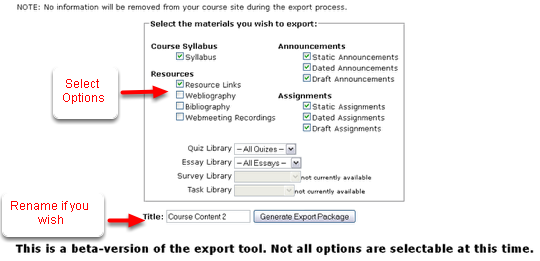
Export Everything
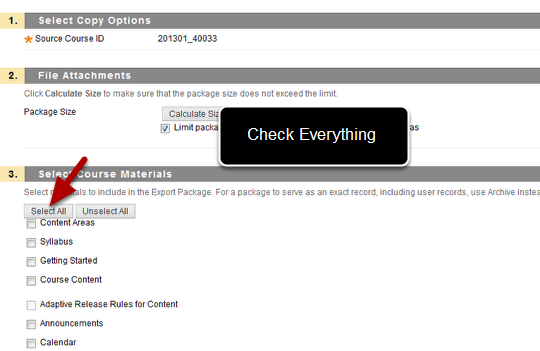
The safest way to export is to check everything! It doesn’t hurt to check things you don’t use and it can cause big problems to export content areas that contain tests, discussion board or anything linked to the gradebook without also exporting the grade center – it is easier to delete things you don’t need later than to try and repair things from a partial export.
If you are sure you know what you want to export you don’t have to check everything – just be sure that if you export the grade center you export all content areas or discussions that have quizzes, graded discussions, assignments, etc linked to the grade center, and visa versa.
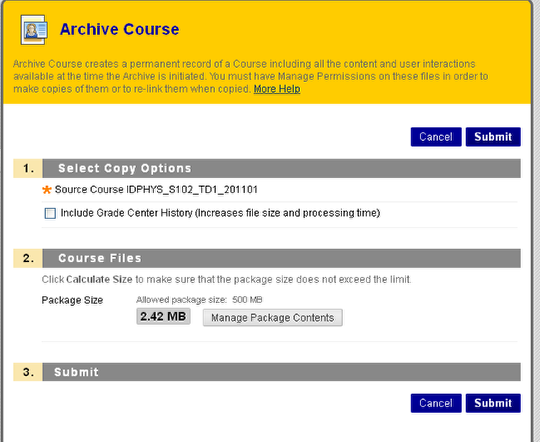
Scroll down and click Submit after checking everything.
Your export has been queued
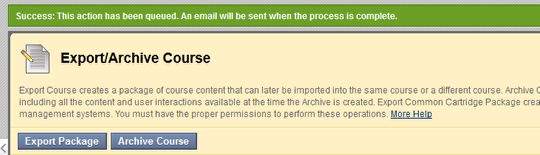
You’ll get a message that your export has been queued and you’ll get an email when its done. The amount of time this takes can vary.
Note – you don’t have to stay on this page – you can go to other courses and set up the export for them as well.
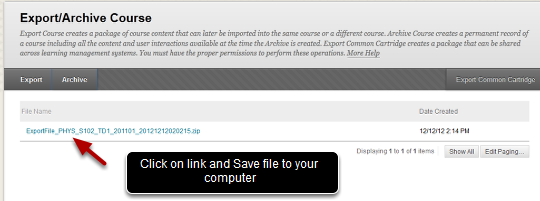
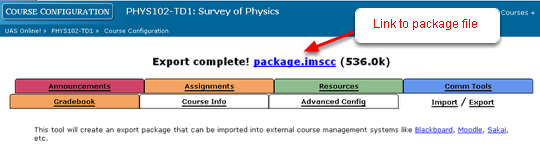
After you get your email notification, save the zipped file to your computer

After you get your email notification return to the old Blackboard course, click on the link shown and save the zip file to your computer.
Be sure and save the zip file in a timely manner – the link will disappear after a while.
It does’t matter if you rename the file as long as you keep the zip extension.
Go to new course
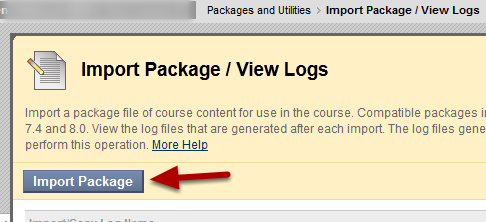
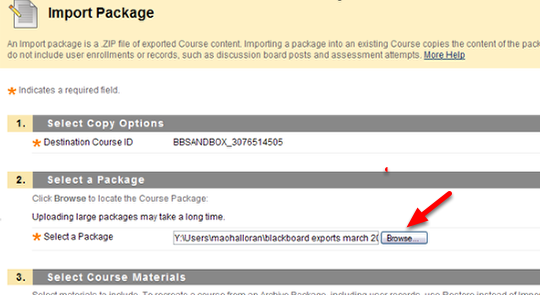
Go to your new Blackboard course
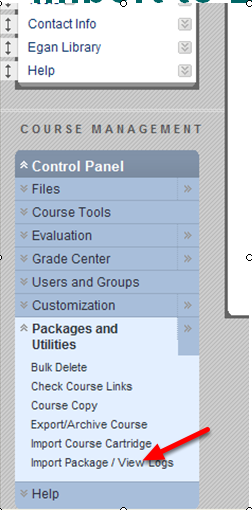
- Go to Control Panel, Packages and Utilities
- Go to Import Package/View Logs
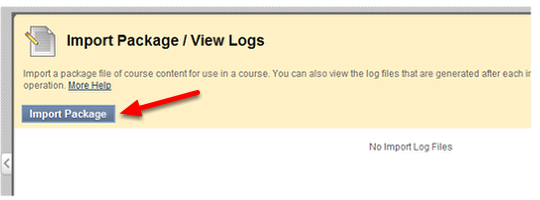
- When the panel loads, click on Import Package
Import the zipped file you previously saved

- Browse and find the zipped file that you previously saved.
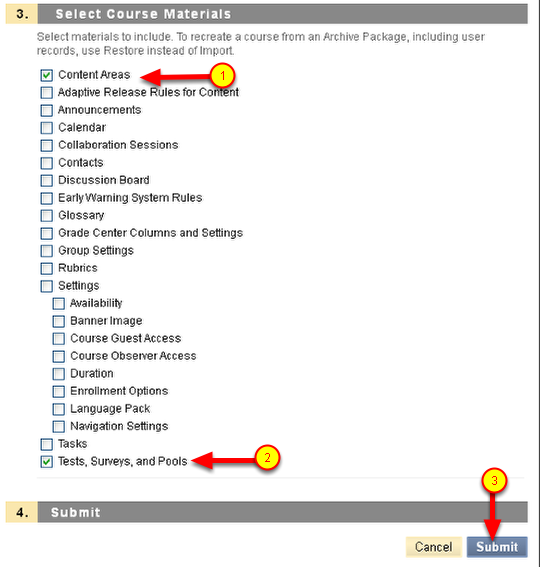
- Click Select All to import all parts of the package (safest choice)
- Scroll down and click Submit
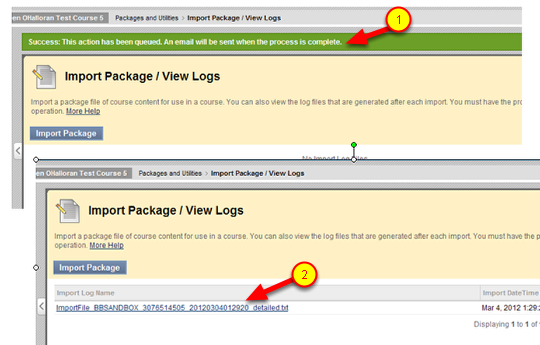
Again it will take a while for the process to complete. You’ll get an email when it is finished. DO NOT EDIT YOUR COURSE WHILE THE PROCESS IS UNDERWAY.
A link to a log file will appear in the Import/View logs panel. The log file will may have some errors and warnings. The best thing is to view your imported content and contact the helpdesk with information about which course/semester you are working with. Problems can arise if you have a) Publishers content which is copyright – in that case you may need to contact the publisher to get a new course package or b) unusual characters in tests or other issues.
Cleaning up your course site

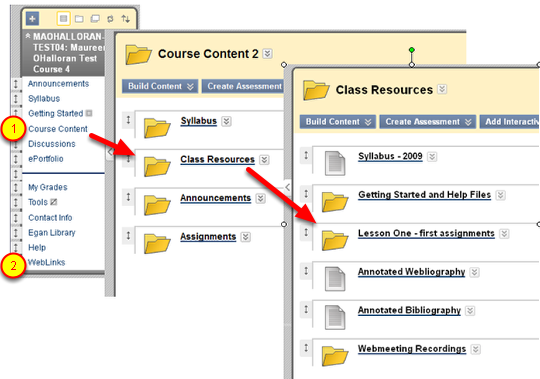
The content areas from your old course will be imported into your new course – you’ll need to re-order them and control their availability.
- Discussion posts may also be imported with your course. These will be relabeled as Anonymous. You will need to go into the Discussion forum, Select All of the posts and delete them to empty your discussion forums.
- When re-ordering things on the course menu "grab" the up/down arrow to the left of the menu item name labeled (1) above (not the name itself)
- If you delete things from your course menu you’ll need to "refresh" (labeled (2) above) in order to see what is deleted.
- If you used the campus pack blog/wiki you may need to export that seperately (from within the wiki or blog) and import (by creating a new campus pack blog/wiki and then choosing Import.