Here is how to export a single test (rather than all tests or the whole class.
In Blackboard Tests live in the “Test Manager” but are deployed in particular content areas and also have associated columns in the Grade Center. To use Course Copy or Export/Import from “Packages and Utilities” to move a single test is not possible. However there is an alternative.
NOTE – this does not work for tests which are drawing from Pools or other Tests as Random Blocks, Question Sets, etc.
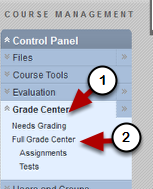
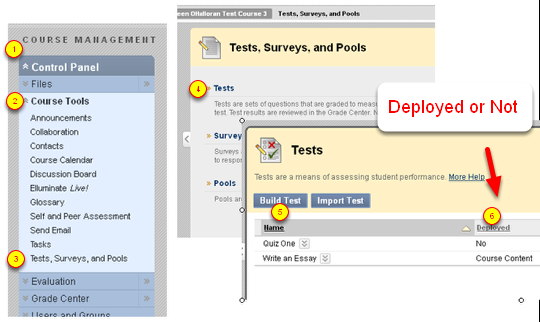
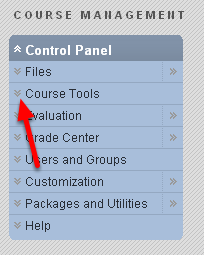
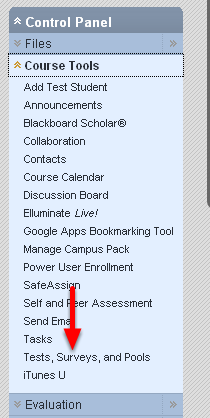
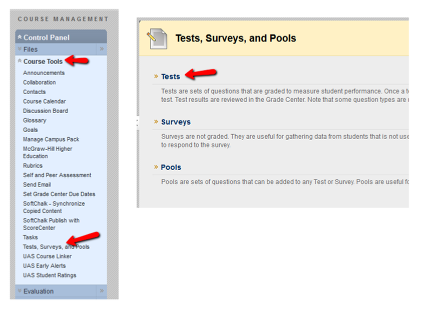
Go to Control Panel > Course Tools > Tests, Surveys and Pools > Tests
In the OLD course go to Control Panel > Course Tools > Tests, Surveys and Pools > Tests
Export the test
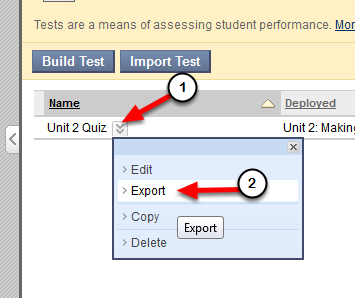
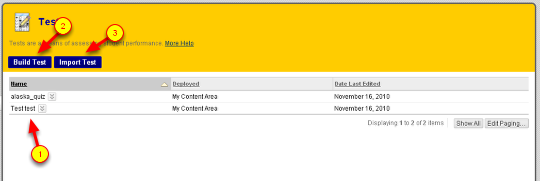
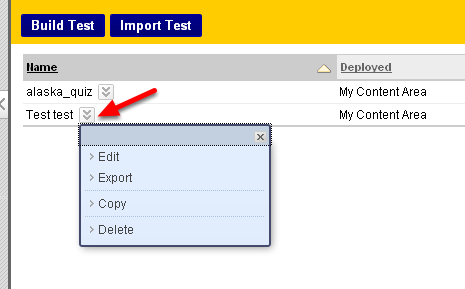
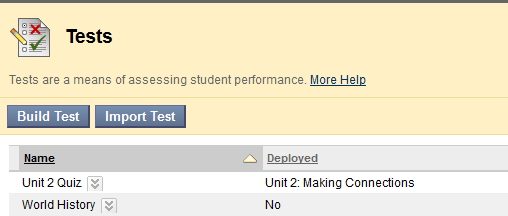
- Find your test.
- Using the drop-down menu next to the test name (1) choose Export (2)
- You will be prompted to save a zip file to your computer
- Remember where you save it!
- If you rename it keep the extension .zip
Now go to your NEW course (where you want to import it
- In your NEW course, go to Control Panel > Course Tools > Tests Surveys and Pools > Tests
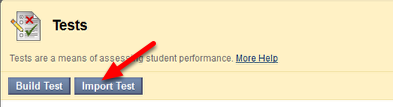
- Once you’re there choose Import Test
- Browse your computer and choose the zip file you just saved
- Submit
Now Deploy Your Test
Your test now “lives” in Tests, Surveys and Pools but must be deployed.
Note that if you go to Tests, Surveys, Pools > Tests and you see “No’ next to a test it means this test is not deployed (posted in a content area where students have access.)
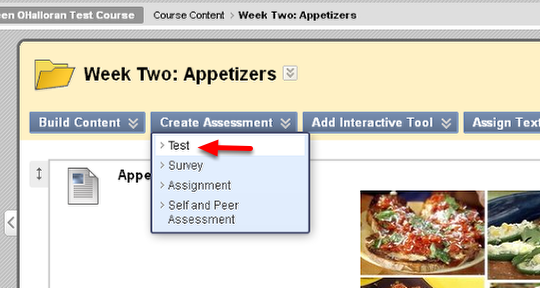
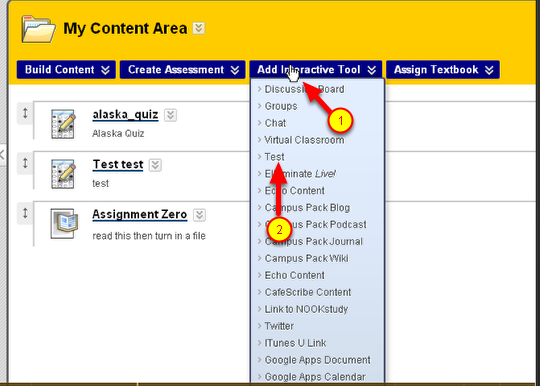
Go to the Content Area to deploy the test
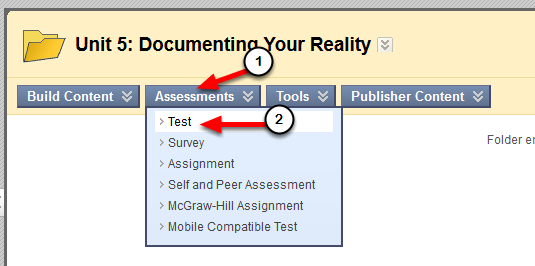
Using the Course Menu, go to the Content Area on the menu and then to the folder where you want to deploy the test.
From the Assessment menu (1) choose Test (2)
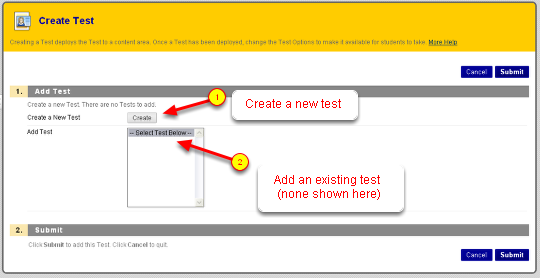
Choose the test
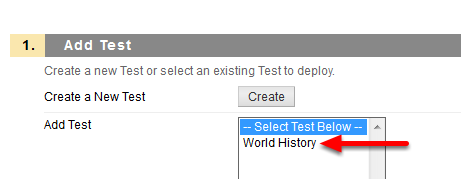
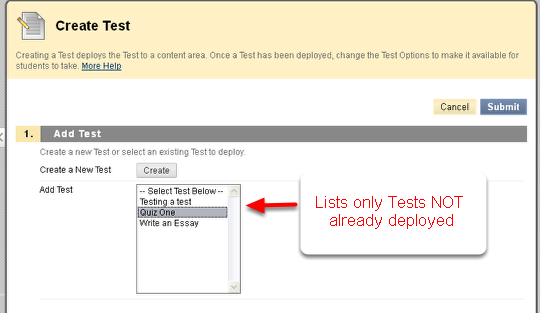
You’ll have a chance to choose from all tests which are not yet deployed – choose the test you want and Submit
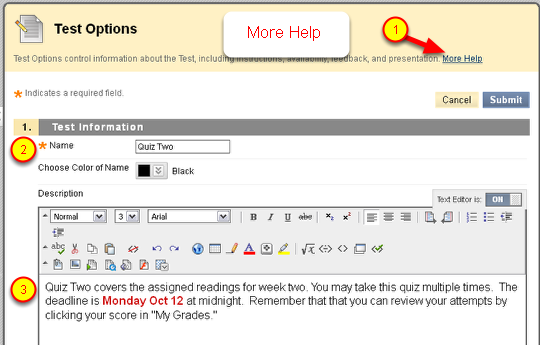
Set Test Options

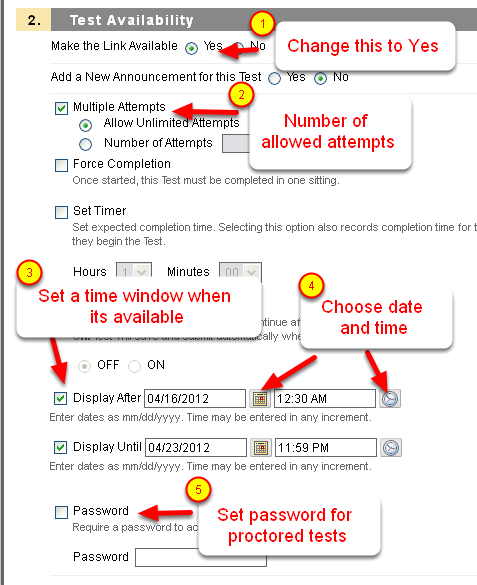
- Set the test options – you can write a description for students to see when they see the link to the test.
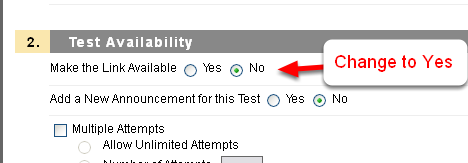
- Tests are unavailable by default – at the very least you must change “Make the Link Available” before your students can see the test. Once you’ve chosen Yes, you can also set a time window for availability, but if you leave it at “No” it will NEVER be available.
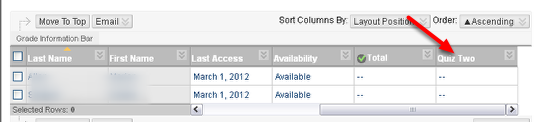
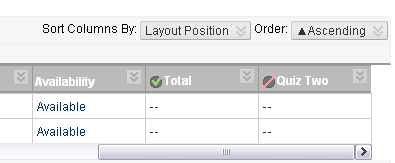
- The act of deploying the test creates a column in the gradebook.
If you want to copy all the test from your OLD course to a new one then you can use Course Copy (found in Control Panel > Packages and Utilties > Course Copy) and check ONLY Test, Surveys and Pools. This is where Tests, Surveys and Pools “live”. They will all copy to your NEW course but not be deployed.
If you copy a Content Area where tests are deployed you must ALSO copy the Grade Center (once a test is deployed it gets an associated column in the Grade Center) AND “Tests, Surveys and Pools” since that is where the test actually lives.
A test that pulls from other Tests or Pools as Random Blocks or Question Sets must be copied simultaneously with those other tests or pools – the only way to to that is to use Course Copy to copy all Tests, Surveys and Pools (and delete the ones you don’t want).