A Learning Module is a series of pages or folders with a table of contents. Within it you can place any type of content, assessment or activity that you would place in a Blackboard content area.
What a Learning Module looks like
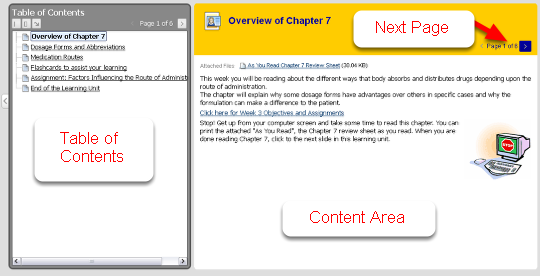
When your students click on the link to a Learning Module, they will see a series of table of contents and a series of pages. They click on the Next Page button (or use the table of contents to click through the pages. The pages can contain items, assessments etc – almost any of the types of content or activities built into Blackboard.
This is NOT what your Learning Module will look like while you are building it – follow the instructions below to see how to build it.
Build a Learning Module
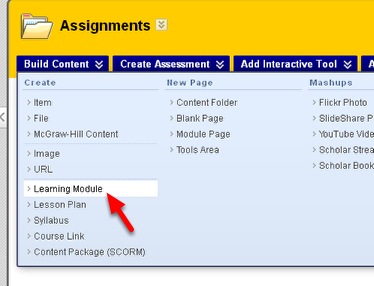
Go to any Content Area and from the Build Content menu choose Learning Module. Give your module a Name and Description. The description will be what the students read before they click on the link to the Learning Module. You can set options for the Learning Module such as availability, etc.
Click Submit when you are done.
Click to enter the Learning Module
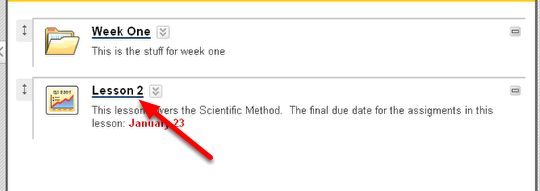
After you click on Submit – click on the name of the Learning Module to enter it and begin building it.
Add Content of Activities
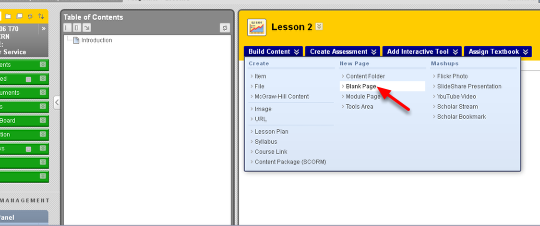
Add "pages" to your Lesson Module by adding Content, Assessments, Interactive Tools, from the same menu that you use to add them to a Content Area. With Editing turned on you will not immediately see that these are new pages, but they will start to be listed in your Table of Contents.
In the first example, we will add an image and some text – to do that we will create a "Blank Page".
Edit the Blank Page
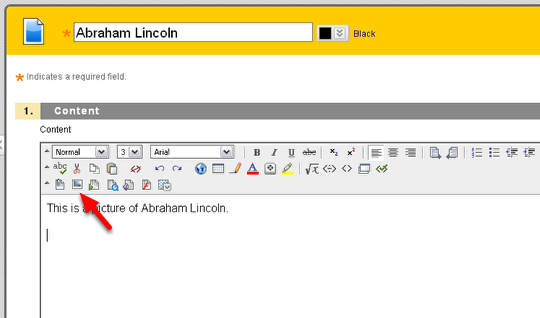
Give the page a name and type text into the text box for content. If you want to add a picture – click on the button that looks like a picture. Do not worry about the fact that if you hover over it, it says "Attach Image" rather than "Insert Image."
Browse to find the picture
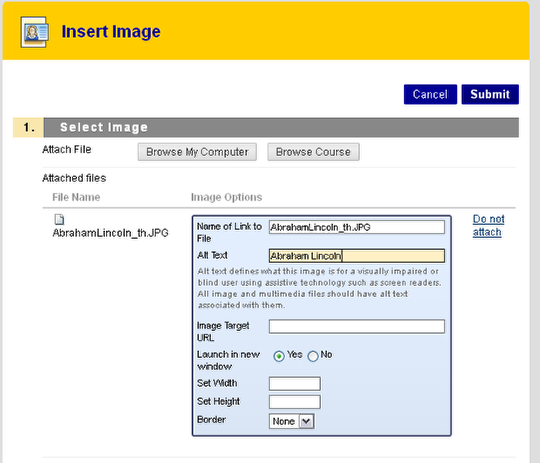
Browse on Computer to find the picture file. Make sure it is re-sized to fit onto the Blackboard page. If you have several pictures you want to add – you can also load them to your "files" area first, then Browse Course to find them in the files area.
Add "Alt Text" to describe the picture then click Submit and then Submit again.
Continue to add content or activities
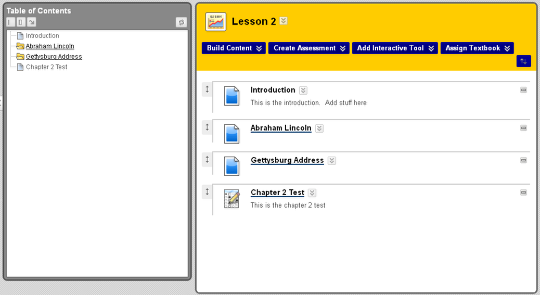
Add more content or activities – each will appear in the table of contents. While Editing is ON you will not see separate pages – just a list of content which you can re-order.
Turn editing OFF to preview
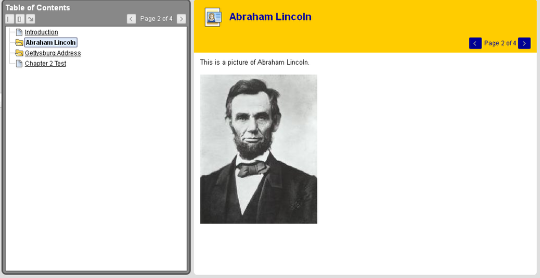
When you turn editing OFF then you will see it as the students do – a series of pages to view one at a time. Each type of content or activity will be on its own page. Some will open automatically in a new window. For example, a Test will open in a new window since it doesn’t work in the lesson plan frame.
For more about Lesson Plans – see http://ondemand.blackboard.com/r91/movies/bb91_lesson_plans_create_lesson_plan.htm