Importing Static and Dated Announcements and Assignments

Static and dated Announcements and Assignments that are exported from UAS Online will be imported into Blackboard as HTML (web) pages. That is, each separate Announcement or Assignment will be an individual HTML page, including any formatting, images, links etc. Webliography and Bibliography are treated in the same way.

These will be located in the Course Content area inside separate folders.

Imported Announcements and Assignments

media_1334005865801.png

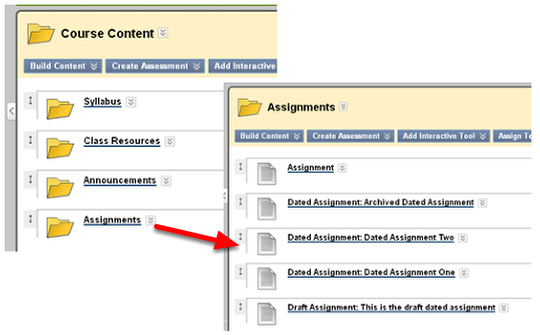
All static and dated Announcements or Assignments will be imported, including with drafts and archives. They will all be visible to students. Clicking on one of these links will open that Assignment or Announcement.

Suggestion

One way to manage the imported Announcements and Assignments is to make the folders that contain them invisible to students then moving the items you wish to re-use into a new Content Area or Folder. The invisible folders will serve as containers for "draft" version of Announcements or Assignments.

Lets look at how you would make a Folder invisible to students and then move a particular item in it to a new Content Area or folder.

Making a Folder Inaccessible to Students

media_1334006013876.png

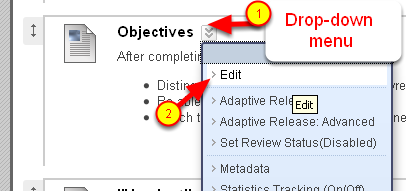
Click on the drop-down menu next to the folder name, then choose "Edit"

Rename the folder and make it invisible

media_1334006352637.png

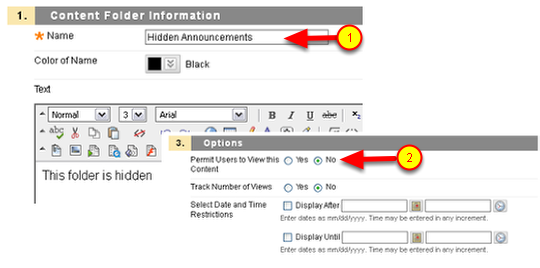
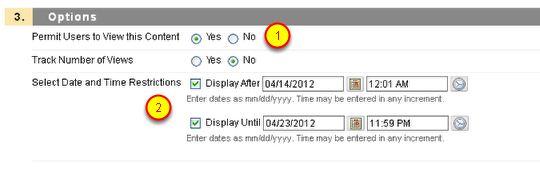
(1) Rename the folder if you wish. You can also add a description.
(2) Scroll down and in step 3 change "Permit Users to View this Content" select "No".
Click Submit

Imported Announcements and Assignments are now invisible to students

media_1334006599935.png

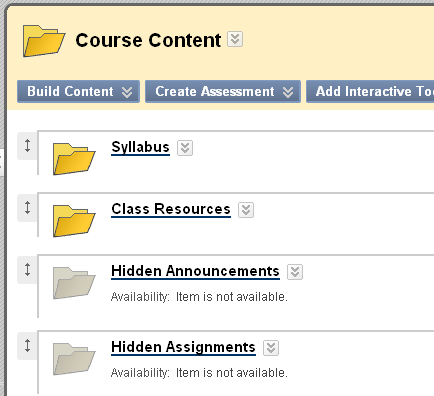
The imported Announcements and Assignments are now invisible to students.

Suppose that you want to re-use one of these Announcements or Assignments. You can do this by moving or copying it to the appropriate Content Area or Folder. As an example, let’s move an Announcement to the "Getting Started" section.

Click on the name of the "Hidden Announcement" folder to go inside it.

Moving or Copying

media_1334006877639.png

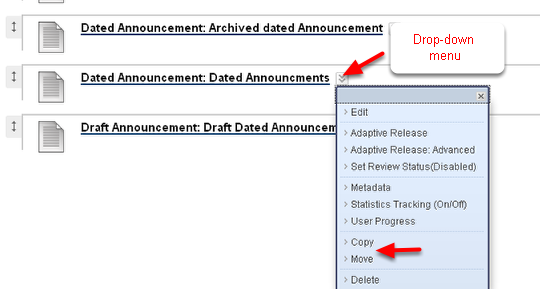
Click on the drop-down menu next to the name of the Announcement or Assignment you wish to copy or move and choose Copy or Move.

Browse and select Content Area or Folder

media_1334007288988.png

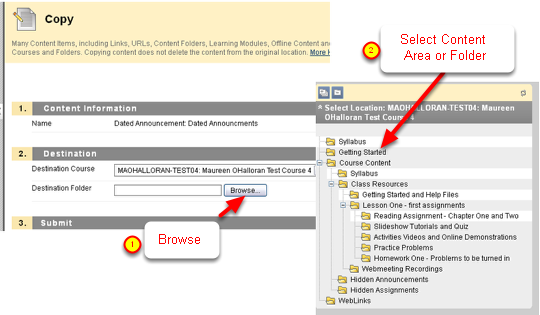
After you choose Copy or Edit, you will get a dialog box which lets you choose any course in which you have instructor access.
(1) Click on the Browse button
(2) A window pops up which shows every Content Area on the Course Menu and every folder in your course.
Click on the name of the Content Area or Folder to which you want to copy or move.
Click Submit.

The Announcement or Assignment can now be found in the new location.

Re-creating Announcements or Assignments as Items

The HTML files which are created from your old Announcements and Assignments cannot be edited online and are difficult to edit even if you download them to your computer. If you plane to re-use Announcements or Assignments, you will need to recreate them as Blackboard Announcements or as Blackboard Items. To do this you will:

  • Copy the material from your imported Announcement or Assignment

and then either

  • Create a Blackboard Announcement by clicking on Announcements in the Course Menu and then "Create Announcement"

or

  • Create a Blackboard "Item" in the Content Area or Folder of your choice.

Create a Blackboard Item

media_1334008295074.png

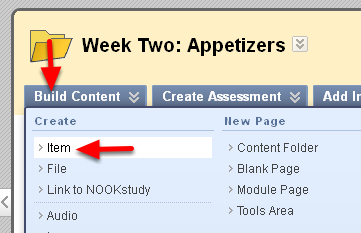
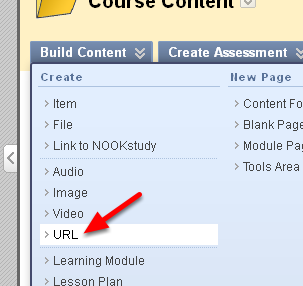
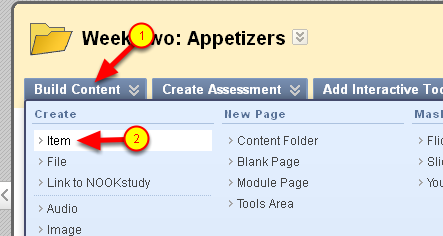
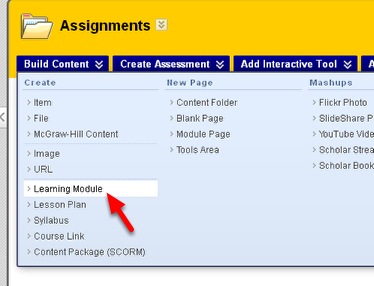
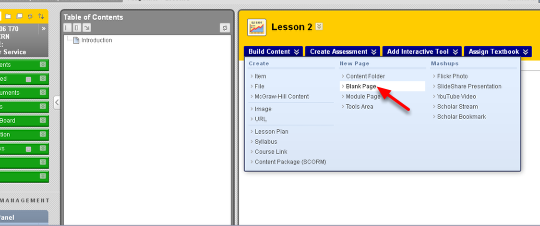
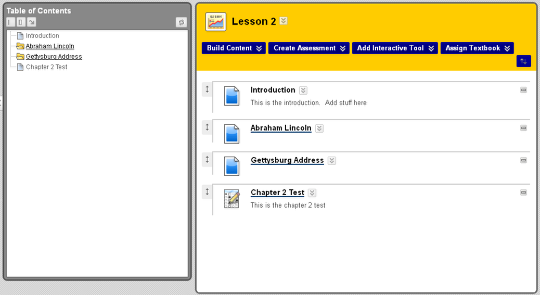
To create a Blackboard Item, go to the appropriate Content Area and Folder. At the top of every Content Area and Folder you’ll see the buttons "Build Content", "Create Assessment", "Add Interactive Tool", etc,

  • Move your mouse cursor over "Bulld Content" and select "Item"

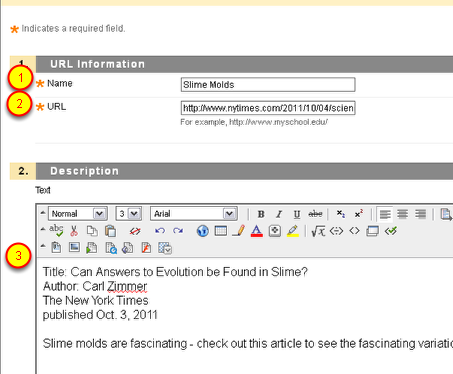
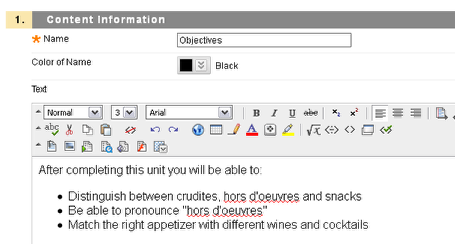
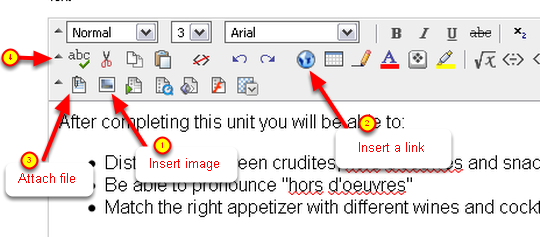
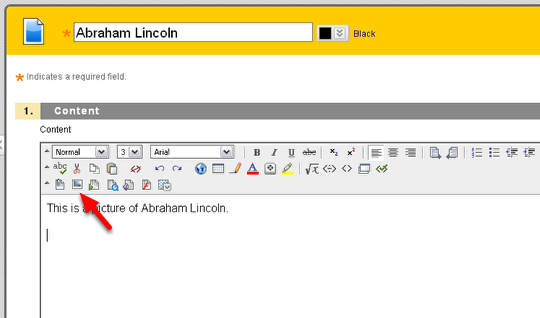
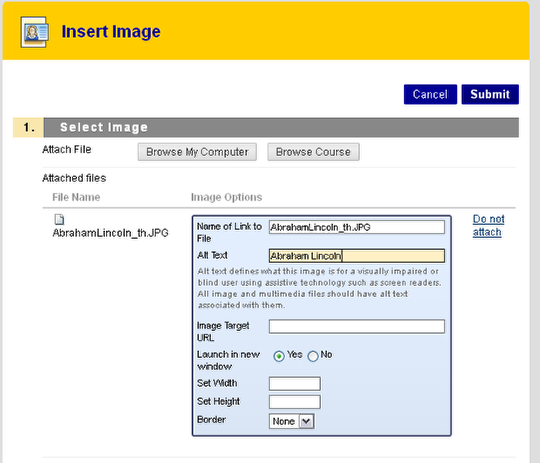
Name the Item and paste the content from the UAS Online Assignment into the textbox.
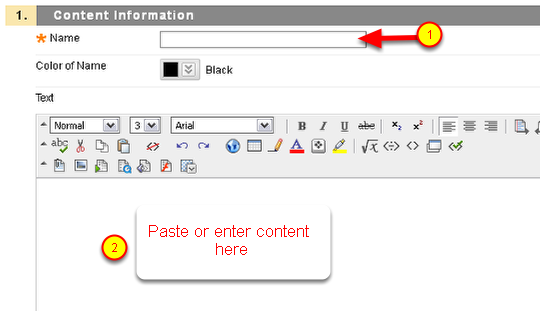
media_1334008379880.png

(1) Name the Item
(2) Paste your content in the textbox
Scroll down and click Submit. (You also have options to attach files and limit availability.)

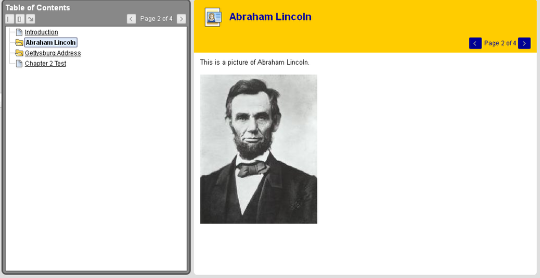
You will now easily be able to edit the Item.

Re-ordering and editing Items.

media_1334008699310.png

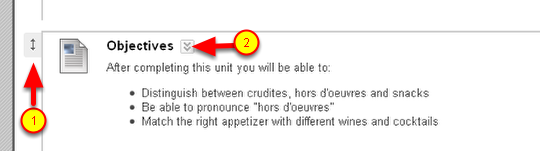
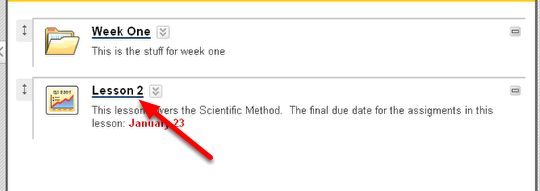
Newly created Items will be at the bottom of the Content Area or Folder. Use the double-headed arrows on the left (1) to drag them up or down and re-order them.
Use the drop-down menu to the right of the Item name (2) to get a menu and choose "Edit" to get back to the textbox that lets you edit or format the content of the Item. You will also be able to change its availability.

Creating a Webliography in Blackboard

Both the Webliography and Bibliography can be imported into your Blackboard course – each as a single HTML page. It will be located in the imported Class Resources section. It will not be possible to edit these online. There is no similar function in Blackboard at this time.

You can compile a list of web resources in Blackboard by creating a Content Area or Folder and then adding content as a "URL". (URL is the acronym for a web address.)

  • Go to the Content Area or Folder and from the Build Content button at the top choose "URL"
  • Enter a Name, URL (the web address including http://), and description
  • Set other options as desired and click Submit

Build Content > URL

media_1334188457824.png

From the Build Content menu choose URL

Add Name, URL, and Description

media_1334189433773.png

You can give the web citation a Name, URL and Description

The Description is where you would put the information needed for a web citation

  • Title
  • Author(s)
  • Publishing Organization or Institution
  • Date of electronic publication

and any other annotations.

There is no way for students to add to the list of web citations on their own. Suggestions for student input include:

  • Having them recommend citations in a discussion board forum
  • Using a sociol bookmarking site such as Diigo (http://diigo.com )

Creating a Blackboard Item

An "Item" is one of the most useful tools for building content in your Blackboard course site. Use it when you want to put text and/or image on the page. You can also attach files and include links. Choose an "Item" with attachments instead of "File" when you want to add a description to a file you are making available to your students.

An Item can have:

  • A Name
  • A description or other text (can include formatted text, images, links and inline attachments).
  • Attached Files
  • Restrictions or time limits on availability

Items can be place in any Content Area or Folder.

From the Build Content Menu choose Item

media_1334342910893.png

Content Areas and Folders all have the buttons "Build Content", "Create Assessment", "Add Interactive Tool", etc. at the top.

  • Move your mouse cursor over Build Content (1) and Choose Item (2).

Give your Item a Name and description or other text

media_1334343258646.png

Give your Item a Name and enter a description or other text in the textbox.

You can add images, links and inline attachments

media_1334343507133.png

Tools in the Rich Text Editor will let you:

  1. Insert an image – click the button that looks like a picture and you can browse your computer or previously uploaded content for an image file
  2. Insert a hyperlink – select the text you want to be a link and then click the globe
  3. Add attached files within your text – after clicking the button that looks like a paper with paperclip, you will be able to browse your computer and add an attachment

If you do not see all the tools in the Rich Text Editor, then they menus might be collapsed. Look for the triangle shaped arrows on the left side of the editor (4). Click on those to expand or collapse the toolbars.

Attaching one or more files

media_1334344000660.png

You can attach one or more files to your Item.

  • "Browse My Computer" lets you upload files from your computer
  • "Browse Course" lets you attach previously uploaded files

To attach additional files, simply repeat the process. The links to the attached files will appear beneath the Item name and above the description.

Restricting availability

media_1334344279961.png

As with almost all Blackboard components you can restrict availability

  • To make the item completely unavailable – change the choice "Permit User to View this Content" to "No". "No" means the Item will NEVER be available to students.
  • To date restrict the Item, leave the choice as "Yes", but check the boxes and select times and dates you want the Item to be available.

Click Submit to finish

Editing the Item

media_1334344562393.png

Edit the item to change text, attachments, availability, etc by using the drop-down menu (1) next to the Item name and choosing Edit. This same menu allows you to copy, move, or delete the item.

Creating a Learning Module

A Learning Module is a series of pages or folders with a table of contents. Within it you can place any type of content, assessment or activity that you would place in a Blackboard content area.

What a Learning Module looks like

media_1319497511550.png

When your students click on the link to a Learning Module, they will see a series of table of contents and a series of pages. They click on the Next Page button (or use the table of contents to click through the pages. The pages can contain items, assessments etc – almost any of the types of content or activities built into Blackboard.

This is NOT what your Learning Module will look like while you are building it – follow the instructions below to see how to build it.

Build a Learning Module

media_1319497814724.png

Go to any Content Area and from the Build Content menu choose Learning Module. Give your module a Name and Description. The description will be what the students read before they click on the link to the Learning Module. You can set options for the Learning Module such as availability, etc.

Click Submit when you are done.

Click to enter the Learning Module

media_1319498113598.png

After you click on Submit – click on the name of the Learning Module to enter it and begin building it.

Add Content of Activities

media_1319500952491.png

Add "pages" to your Lesson Module by adding Content, Assessments, Interactive Tools, from the same menu that you use to add them to a Content Area. With Editing turned on you will not immediately see that these are new pages, but they will start to be listed in your Table of Contents.

In the first example, we will add an image and some text – to do that we will create a "Blank Page".

Edit the Blank Page

media_1319501110916.png

Give the page a name and type text into the text box for content. If you want to add a picture – click on the button that looks like a picture. Do not worry about the fact that if you hover over it, it says "Attach Image" rather than "Insert Image."

Browse to find the picture

media_1319501296243.png

Browse on Computer to find the picture file. Make sure it is re-sized to fit onto the Blackboard page. If you have several pictures you want to add – you can also load them to your "files" area first, then Browse Course to find them in the files area.

Add "Alt Text" to describe the picture then click Submit and then Submit again.

Continue to add content or activities

media_1319503100004.png

Add more content or activities – each will appear in the table of contents. While Editing is ON you will not see separate pages – just a list of content which you can re-order.

Turn editing OFF to preview

media_1319503188573.png

When you turn editing OFF then you will see it as the students do – a series of pages to view one at a time. Each type of content or activity will be on its own page. Some will open automatically in a new window. For example, a Test will open in a new window since it doesn’t work in the lesson plan frame.

For more about Lesson Plans – see http://ondemand.blackboard.com/r91/movies/bb91_lesson_plans_create_lesson_plan.htm