Creating a Blackboard Item

An "Item" is one of the most useful tools for building content in your Blackboard course site. Use it when you want to put text and/or image on the page. You can also attach files and include links. Choose an "Item" with attachments instead of "File" when you want to add a description to a file you are making available to your students.

An Item can have:

  • A Name
  • A description or other text (can include formatted text, images, links and inline attachments).
  • Attached Files
  • Restrictions or time limits on availability

Items can be place in any Content Area or Folder.

From the Build Content Menu choose Item

media_1334342910893.png

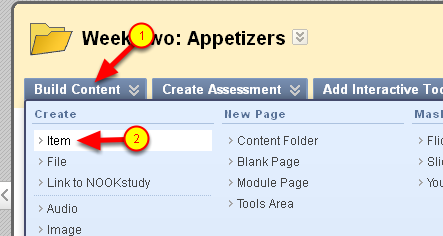
Content Areas and Folders all have the buttons "Build Content", "Create Assessment", "Add Interactive Tool", etc. at the top.

  • Move your mouse cursor over Build Content (1) and Choose Item (2).

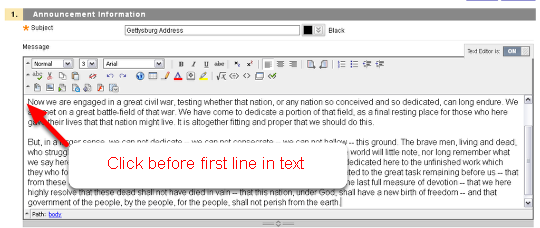
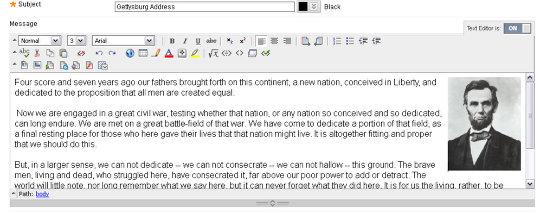
Give your Item a Name and description or other text

media_1334343258646.png

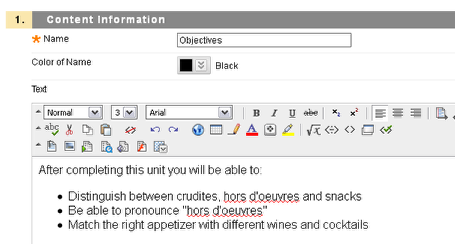
Give your Item a Name and enter a description or other text in the textbox.

You can add images, links and inline attachments

media_1334343507133.png

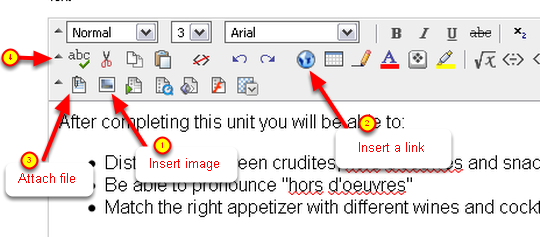
Tools in the Rich Text Editor will let you:

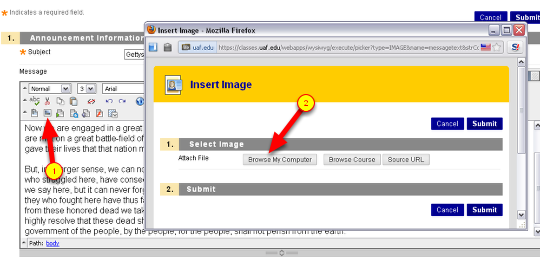
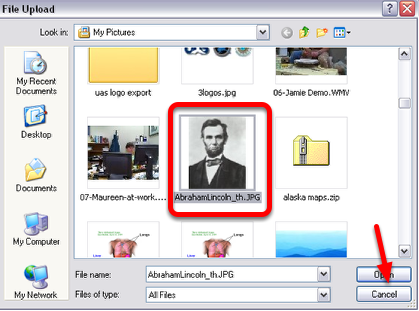
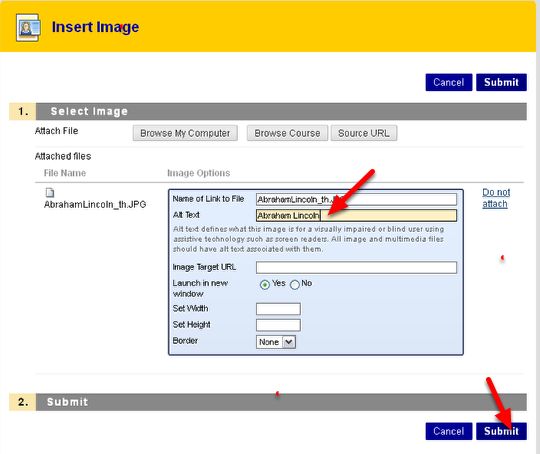
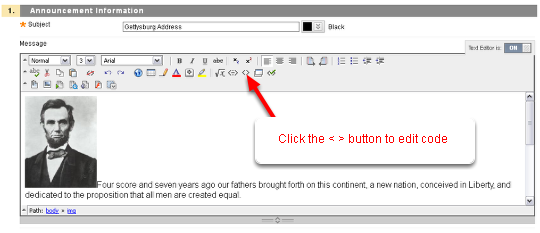
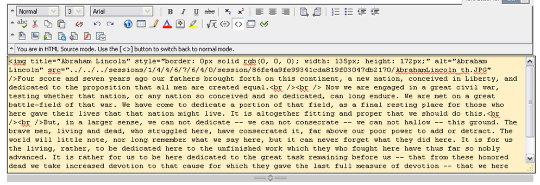
  1. Insert an image – click the button that looks like a picture and you can browse your computer or previously uploaded content for an image file
  2. Insert a hyperlink – select the text you want to be a link and then click the globe
  3. Add attached files within your text – after clicking the button that looks like a paper with paperclip, you will be able to browse your computer and add an attachment

If you do not see all the tools in the Rich Text Editor, then they menus might be collapsed. Look for the triangle shaped arrows on the left side of the editor (4). Click on those to expand or collapse the toolbars.

Attaching one or more files

media_1334344000660.png

You can attach one or more files to your Item.

  • "Browse My Computer" lets you upload files from your computer
  • "Browse Course" lets you attach previously uploaded files

To attach additional files, simply repeat the process. The links to the attached files will appear beneath the Item name and above the description.

Restricting availability

media_1334344279961.png

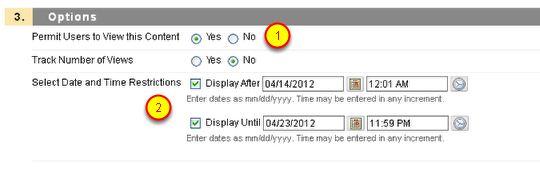
As with almost all Blackboard components you can restrict availability

  • To make the item completely unavailable – change the choice "Permit User to View this Content" to "No". "No" means the Item will NEVER be available to students.
  • To date restrict the Item, leave the choice as "Yes", but check the boxes and select times and dates you want the Item to be available.

Click Submit to finish

Editing the Item

media_1334344562393.png

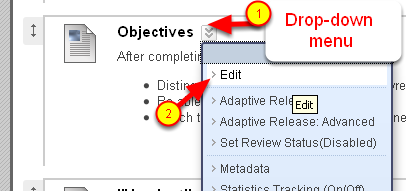
Edit the item to change text, attachments, availability, etc by using the drop-down menu (1) next to the Item name and choosing Edit. This same menu allows you to copy, move, or delete the item.

Add a picture to an anouncement or item

This lesson describes how to add a picture to an announcment or item and have the text wordwrap around the image.

Wordwrapping text around an image

wpid161-media_1319069096234.png

When you want to include an image in the text of an announcement or item, it is desireable to have the text wordwrap around the image as shown. The following steps show how to make that happen. It will require editing some HTML, but it is fairly simple.

Create the announcement or item

wpid162-media_1319069485298.png
  • Create the announcement or item and type in the text that you want.
  • Click before the first line in the text to position your cursor there. This is where we will insert the image.

(It is possible to insert images elsewhere, but this will be the simplest example.

Insert Image

wpid163-media_1319069659735.png

(1) Click on the Attach Image button (which looks like a picture).
(2) Click Browse My Computer to find the image file on your computer.

(Note – if you have an image you have previously uploaded to use elsewhere in your course you can click Browse Course)

Browse and find your picture

wpid164-media_1319070129940.png

Select your picture, then click Open

Enter “Alt Text” for your picture

wpid165-media_1319072148115.png

Enter a Text Description for your picture where it says “Alt Text” then click submit (don’t worry about anything else on this screen – it doesn’t apply or is not needed here).

At the next screen – click submit again.

Your picture is now in line with the paragraph of text

wpid166-media_1319072591529.png

Your picture is now in lign with the paragraph of text – this is NOT what we want.

Click on the < > button to edit the HTML code (don’t be scared – this won’t be too hard!)

Edit the img tag in the HTML

wpid167-media_1319072622438.png

If you inserted you image before the very first line of text – the top of the code should read something like this:

<img title=”Abraham Lincoln” style=”border: 0px solid rgb(0, 0, 0); width: 135px; height: 172px;” alt=”Abraham Lincoln” src=”../../../sessions/1/4/4/6/7/6/4/0/session/86fe4a9fe99341cda819f03047db2170/AbrahamLincoln_th.JPG” />Four score and seven years ago our fathers brought forth on this continent, a new nation, conceived in Liberty, and

that is, it will begin with <img then have some information, then end with /> before the actual text you entered begins.

After the <img – leave a space and then type in the following text exactly

align = “right”

(including quotation marks). The code will now read something like this:

<img align=”right” title=”Abraham Lincoln” style=”border: 0px solid rgb(0, 0, 0); width: 135px; height: 172px;” alt=”Abraham Lincoln” src=”../../../sessions/1/4/4/6/7/6/4/0/session/86fe4a9fe99341cda819f03047db2170/AbrahamLincoln_th.JPG” />Four score and seven years ago our fathers brought forth on this continent, a new nation, conceived in Liberty, and

Note the quotation makes around the “right”. Do not add any punctuation such as commas. Do not accidentally delete any of the other code.

Click on the < > button again to get out of code view.

Your text now wordwraps around your image!

wpid168-media_1319073110043.png

Your text now wordwraps around your image!!!! Click Submit to finish

If you want your image to be on the left you can also use align=”left”. You can actually position your image anywhere you want, but putting it at the top makes it easier to spot the HTML code you must edit.

Remember: Files for images to be used on the web must be one of these format: jpg, gif, png. If you have clipart or images of another format – try pasting them into Word or Powerpoint then using a screen capture tool such as Jing to make a png file.

Remember to re-size your images before uploading. Although you can resize them in the text editing box – this will NOT resize the files and if your image starts out very large, then although it displays as a small image, the file size is still large and will take longer to display for your students.

Bonus step

If you are comfortable editing the HTML you can also add this to the “style” field inside your img tag: style=”padding:10px;” as shown below. There is a colon : after padding and a semi-colon after 10px. This will add ten pixels of padding around your image – you can change the number 10 to increase or decrease the padding.

<img align=”right” title=”Abraham Lincoln” style=”padding:10px;border: 0px solid rgb(0, 0, 0); width: 135px; height: 172px;” alt=”Abraham Lincoln” src=”../../../sessions/1/4/4/6/7/6/4/0/session/86fe4a9fe99341cda819f03047db2170/AbrahamLincoln_th.JPG” />Four score and seven years ago our fathers brought forth on this continent, a new nation, conceived in Liberty, and